Wednesday, June 8

The School Year Is KNOT Over Yet...

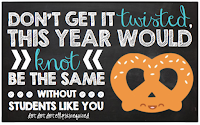
The end of a school year can be a very busy time, but you can't forget to let those that were a part of your year know how much you appreciate them. I used this particular label for a parent treat on conference night, however, this could be great for those end of the year gifts too!


 I know, you're KNOT surprised about the pun... it's what I do, but you may be surprised at how easy... and cheap... these were to make! I used regular pretzel twists along with white and milk chocolate covered pretzels to fill the bags. I went to Aldi (my new obsession) for all of the tasty treats (such a bargain), printed the labels on card stock, and used regular clear gift bags that can be found at stores like Target, Walmart, or even amazon!


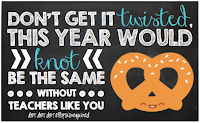
The bags I made were for parents, however, I have made different options for you to purchase! In addition to parents, there are also labels for students and teachers available in my TPT store! Click on the pictures below!

https://www.teacherspayteachers.com/Product/Printable-STUDENT-Pretzel-Gift-Bag-Tag-Label-2585421 https://www.teacherspayteachers.com/Product/Printable-TEACHER-Pretzel-Gift-Bag-Tag-Label-2585427 Parent Gift Bag Label

So, even if your end of the year is a bit hectic, you can now say you have thank you gifts covered!

Wednesday, May 11

Permanent Mark-er!

Some people just leave a permanent mark on your life. In my last post I told you about how much I loved my long term sub position because of the students I got to spend my days with, but without my amazing co-workers, I know that my experience would not have been as meaningful. We shared, laughed, vented, and... did I mention we laughed?... A LOT this year! It's a wonderful feeling knowing you have a group of people to turn to that just get it! I know I will be a better teacher because of what they taught me this year. Hopefully you are lucky enough to have a support system to lean on at work as well.

So, how did I show them that I appreciated all their help this year? 


I made something with a pun, duh! 

I gave each teacher a set of three sharpies with this little note. I was also very excited for a chance to finally use my washi tape that I've been purchasing without a purpose (see Greg, I always figure out a way to use the things I buy)!


Whether you're a first year teacher, a student teacher, or a seasoned teacher that just wants to express their appreciation for their co-workers or mentors, you should grab this gift tag in my shop! This also fits sharpie thin pens and paint markers.

If you use this gift tag, I'd love to see your variation! 

Grab it here!

Tuesday, May 10

This Year Has Blown By...

get it? because bubbles... and a blow pop... and gum... hehe
Can you even believe that this school year is almost over? The year has definitely blown by quickly... even more quickly for me because my long term substitute position just ended last Friday. I can't say that I am excited about the position ending because I really miss my little first grade friends, especially since I was with them since September, but I can say that this position has made me a better teacher and has confirmed that I am meant to be in the classroom. Luckily I am tutoring in the same school, so I still get to see them!

So, although you are excited for the school year to come to an end, appreciate those little ones that you get to have in your class with you every day for just a bit longer!

I showed my appreciation for my little guys with these:


I wanted them to know how proud they have made me this year, but I couldn't do it without a pun (which the kids totally expect from me now)!

I originally went to Target to get the $1 boxes of chalk, but the store I went to was all out. I was racking my brain while I searched the racks in the dollar spot for another idea. I turned the corner and saw the brightly colored bubbles... 3 for $1... and the rest is history!

I like this idea better than my original idea, and it ended up being cheaper! If you'd like to make these for your students as well, you can purchase the gift bag labels in my teachers pay teachers store (just click the picture below)! I chose to add in the Blow Pop and the Double Bubble, ya know... to really get my pun point across, but it works with any of those items! I also used "gussett style 4" x 2" x 9" cello bags" from Amazon, but any clear gift bag in a similar size will work!

Purchase Gift Bag Label

Don't worry, I didn't forget my wonderful co-workers that helped me make it through! Details about their punny gifts, coming soon!

Wednesday, February 10

Valentine's Day

In honor of Valentine's Day I am going to talk about a few things that I really love: decorating, crafting, and teaching!

If you follow my Instagram, you know that I decorate for every holiday! I have a buffet... a pseudo-mantle... to display my holiday decor. 


This is my Valentine's Day display... someday I will get around to posting my displays for each holiday! Most of the items I get are from places like Hobby Lobby, Homegoods, and Target.


There are also items that I make myself because I can't find what I want in the store... which leads me to second love... crafting! See those cupcakes on the fabulous cupcake tier? They are... FAKE! Seriously, they are made with foam and dry wall compound.

 If you want to make them yourself you will need:

  1. Tins and Liners: Fill cupcake tins with paper liners.
  2. Washers: Put one washer on the bottom of each cupcake liner.
  3. Expanding Foam: Fill each cupcake liner with expanding foam about half way. The expanding foam is one time use. I was able to make 3 trays of 12 "cupcakes", for a total of 36. The foam will expand, much like cupcakes do in the oven when baked!
  4. Dry: The "cupcakes" should be expanded and tack free after about 20 minutes. The instructions on the can says that the foram can be painted after 12-24 hours, I painted mine the next day.
  5. Paint: Paint each "cupcake" in a tan or brown color to mimic vanilla and chocolate cake.
  6. Frosting: Mix the dry wall compound with food coloring to make "frosting". I suggest using glass bowls because it washes off very easily. I didn't have brown food coloring, so I used paint to color the compound for chocolate, pink food coloring for the strawberry, and left the compound as is for vanilla (I made sure to purchase compound that was white, as opposed to a grey-ish color so it looked like vanilla). You want the consistency of the "frosting" to be like actual frosting, so add flour if it is too watery. 
  7. Piping bag: Fill your piping bag with the "frosting" and pipe onto the cupcakes. If you get it to the consistency of actual frosting, it should stay in the shape you pipe.
  8. Decorations: Sprinkle and add decorations onto the wet "frosting" so as it dries it will bond. Be careful with real sprinkles, the color may run if the "frosting" is too wet.
I made my cupcakes last year, and they still look great!
Speaking of making things... to let my students know how much I love teaching them, I made a special valentine for them. I found my inspiration in the Target dollar spot... well technically the $3 spot.

The valentines came like this:


I decided to make my own card to go with the donut erasers!


If you want to make the same valentines, you can find them in my Teachers Pay Teachers store here

So, what do you plan on doing for Valentine's Day? Have you made any crafts? Greg and I are going to go out the day after to take advantage of a 50% off bottle of wine deal, and I don't have school Monday or Tuesday! 

Thursday, July 30

Yellow & Grey to Make Your Day!

Hey teacher friends, it's been a while... sorry, I have been busy with my DIY friends (although, I know some of you fall under both categories)! You've probably been too busy enjoying summer vacation to even notice, huh?!

However, that little voice in the back of your head has you thinking about the upcoming school year... doesn't it? I have a classroom bundle just in time for your summer classroom planning!

This time my classroom bundle is for those of you that love yellow paired with grey!


Here's what's included in this 70 page bundle:

*Page 1-2: Clock Numbers (:00, :05, :10 etc.) **I use my fiskars circle punch to punch out black circles to back the numbers before laminating!**
*Page 3-10: Table numbers (small for tables, large to hang) numbers 1-6
*Page 11-21: Calendar Pieces (months, black and turquoise numbers, today/tomorrow/yesterday cards, birthday cards, blank holiday cards)
*Page 22: Homework Page (M,T,W,Th,F,Sat/sun)
*Page 23: Lesson Planning Page (math, science, social studies, reading, writing, other)
*Page 24-30: ABC Word Wall Headers
*Page 31-37: Number Cards (0-10 & three blank cards)
*Page 38-52: Animal Alphabet Cards (including 2 blank and 1 page listing what each picture is)
*Page 53: 2 Name Plates
*Page 54-55: Bulletin Board Borders (Yellow & Grey Chevron)
*Page 56- Blank Gift Bag Labels
*Page 57-61: Welcome Banner Flags
*Page 62-70: ABC Bunting

Here's a close-up preview of some of the items!
 

As always, I'd love to hear your suggestions as to what else I can create to make my classroom bundles even better! Maybe you need cursive letters for your classroom? Let me know! A behavior chart to match? Tell me what you're hoping for!

I also have a movie themed and turquoise, black, and white classroom bundle available in my TpT store!


Tuesday, July 28

Whatever Will 'B', Will 'B'...


This summer has been a bit of an adventure for me. In this short summer,  I have learned a lot about life.  I have experienced the loss of a loved one, the birth of a few new best friends, and I made it to my {first} 29th birthday. This summer has given me time to reflect on how amazingly beautiful and heartbreaking life can be, and how lucky I am to be here. I have an education, a house, a wonderful family, an incredible boyfriend, and life long friends. I suppose, at my age, it is normal to start thinking about life. We are reaching so many different milestones... things we have dreamt about since childhood! I am so thankful to be reaching (or at least getting closer to) these milestones with a group of wonderful friends by my side. You've heard the song, "Que Sera, Sera"? Well, I am content in knowing that whatever will be, will be along with the people I care about the most!

In this post, I'd like to celebrate new life by talking about about a little "Baby B's" shower that I helped plan! My friend Maria is a pioneer of sorts, as she seems to be at the helm, leading us through these major life milestones! She was engaged and married first... and, most recently, she just had a baby on June 1st (I thought the baby may have had my birthday... June 28th... Maria did NOT like that prediction)!

When Maria told us she was pregnant there were tears of joy... and then when we found out she was having a girl... there were more tears, and squeals of excitement that we were truly having a "girl's lunch"!

How cute is this gender reveal scratch off card Maria gave us?!

Of course, I immediately began to think about Maria's shower, so we teamed up with her mom.  This brought us all back to high school when we would invite ourselves over Maria's house all the time! Maria mentioned she would want a Classic Winnie the Pooh theme. This is even more adorable because their last name begins with "B, and we referred to the baby as "Baby B" the whole pregnancy.  "B"s and Pooh Bear... perfect match! We painted these adorable "hunny" pots (got the idea here) ... and of course, there were plenty of laughs and snacks!


I was given pieces of wood from a friend that used them at her wedding. Kristen picked up the wood and then her husband made some cupcake tiers out of them (thank you for making my vision come to life!) I also glued tissue paper on branches to look like flower buds. I was going for a "100 Aker Wood" look.

Obsessed with Eeyore doing a headstand over there on the left!
I printed out Classic Pooh Bear characters onto white card stock and glued them onto toothpicks for simple decorations. I finally got to use my "grass" piping tip that Greg got me a while ago (after listening to me complain about how I couldn't make grass for my Truffula tree cupcakes for my Dr. Seuss themed kindergarten graduation... I make gift giving so easy for him). I found the edible bees at Walmart and piped some hives for them to sit upon (the frosting wasn't as thick as I would have liked it to be, so the hives weren't as tall).


For the centerpieces we kept it simple.  Framed quotes or images on the wood pieces, along with the "hunny" pots.


The favors were little jars of honey (Maria's mom's brilliant idea).  We topped the jar with bumblebee fabric and attached a tag with twine.  


I also created some games for guests to play at the table. Personally, I do not love shower games that require you to get up and do things. I like to chit chat! Maria also requested that we not play the "what's in the dirty diaper?" game or make anyone drink from baby bottles... not that I would have done that in the first place (ew)!

ugh, number 7 is supposed to be 'onesie', but I left out an 'e' on half of the cards... so 'noise' works!
Of course there were presents... and of course I wrapped mine in a super cute way ;)


Want to know what I got for Maria? Next blog post I'll have a wonderful baby shower DIY for you!

Here's a clue:


Any guesses?

Saturday, July 4

File Under "A" for Awesome!


I spy a new addition to the craft room!
It was just my 29th birthday, so that makes me an "almost adult"... right? So, I should probably have a filing cabinet for all of my super important adult documents... What's that, you too are an "almost adult"? Well, lucky for you, I have a really awesome and easy DIY for you today!

I took a trashy filing cabinet, and turned it into a treasure! I loved this project so much, I already have another {FREE} filing cabinet ready to be re-done for my classroom!


WHAT YOU'LL NEED:
  • sandpaper
  • cleaning supplies
  • screwdriver
  • primer (and roller if using canned primer)
  • spray paint
  • painter's tape
  • plastic bag or other protective covering

1. PLAN: Plan out your design before you start painting. Do you want the cabinet to be one color, or two? Will the fronts of the drawers have a design? I planned out my cabinet in Microsoft Word beforehand (things like this truly make me happy!)... I am a visual person, and seeing the colors together helped me make my decision.


2. REMOVE HARDWARE: Remove handles, label holders, and any other hardware your cabinet may have.  My handles were screwed on which made for an easy removal. For the label holders,  I used a flat head screw driver to pry up the metal tabs securing them.  You can use painters tape to cover the lock on the bottom drawer, or stick a piece of paper inside the lock opening to keep paint out if you want the lock primed.  Some filing cabinets are different and may have additional hardware or handles that are not removable.

3. CLEAN/ SAND: In order for the primer to adhere to the best of its ability, it is a good idea to wipe the filing cabinet down to remove any dust or dirt.  The amount of sanding that you'll have to do depends on the condition of your filing cabinet (if you sand, wipe down the cabinet after this step). This cabinet was in fairly good condition (no paint loss) so I did a light sanding all around. The bottom edges had a bit of rust, so I sanded more heavily there to remove that and make it a level surface.  

4. PRIME: You can use a spray primer, or a paint/roll-on primer.  For this cabinet, I actually used both options.  My spray ran out before I was done, so I grabbed a canned primer and a roller and completed the job. I used Zinsser primer and did 2 light coats. The only thing I noticed is that there are some of the stippled roller marks on the front of the cabinet that can only be noticed when inspected closely (almost like the ones on painted walls)... so if this will drive you crazy, use a spray primer. With your hand, feel for any uneven spots after you prime.  Lightly sand these spots in between primer coats. Use a rag to brush off any dust left from sanding. Make sure to let the primer dry according to the directions on the can. 


5. PAINT: Now it's time for color! I used Valspar spray paint in Nautical (satin), Brushed Rose (flat), White (flat), and Brilliant Gold. The body of the filing cabinet needed 3-4 coats.  As you can see in the pictures, it was streaky at first, but after the 3-4 coats it got better (don't get frustrated). Even after those coats, it may look like there are streaks, but it is the contrast between the fresh spray paint and the more dry paint. Eventually it will go away!


The drawer fronts only needed 1-2 coats because they were white and it was going on over the white primer.  I used painter's tape for the stripes, and a garbage bag to cover the rest of the drawer front that I did not want painted.  Make sure it is completely secured so no paint can get under the bag! Let the spray paint dry according to directions before adding additional details. 
I spray painted the hardware gold.  I did not prime the hardware because my spray had run out, but if I had the option, I probable would have! I sprayed 2 coats of gold to the hardware. The lock was painted with a gold acrylic paint (in a not perfect match). I did not want to attempt to spray paint the lock and ruin my other work!

5. PROTECTION: What? I can get pregnant from painting a filing cabinet? Haha no! I mean a protective top coat and felt feet. These steps are optional.  If you think you need a clear protective top coat you can spray one on.  I did not choose to put a protective coat on because I didn't have one when I chose to do this project.  However, my cabinet has held up fine so far.  Just make sure you let the paint dry for a few days before putting anything on top of it. Another option is adding felt feet on the bottom.  My cabinet is on a hardwood floor, and with the felt feet it is now easy to move without damaging the floors or having to lift it.   


I just love this filing cabinet, even though I haven't even put any files in it yet. Eventually I will organize my teaching templates and items I have made... and those aforementioned important adult documents! My next cabinet, for my classroom, will be black and white! What are your plans for your rusty old filing cabinet?


1. PAINTING: When I was painting the pink stripe, I did not secure the plastic bag on well enough.  Some of the pink paint over-spray got onto the white part of the drawer.  I had to then repaint white over that.  Save yourself those extra steps and secure the cover!

2. DRYING TIME: LET THE PAINT DRY! I, of course, was impatient and had to style the top of the filing cabinet the next day!  When I tried to move the things I had stacked on top, the items had left indents in the paint.  After waiting about a week, the paint had a chance to harden and nothing sticks to the top anymore.

3. HARDWARE: If you want to spray paint your lock, that is something to do ahead of time, before priming and painting.  I would have liked to have the lock painted in the same gold as the rest of the hardware, however, I didn't think about that until the end when it was too much of a hassle/ risk to do it.  Cover as much of the cabinet as you can and then spray the lock.  After the lock dries, cover it in painters tape and you can prime and paint the rest of the cabinet... any over-spray from painting the lock will be covered by the primer and paint!

I want to see your painted filing cabinets! Send me your pictures!