Showing posts with label Teachers pay Teachers. Show all posts

Wednesday, June 8

The School Year Is KNOT Over Yet...

The end of a school year can be a very busy time, but you can't forget to let those that were a part of your year know how much you appreciate them. I used this particular label for a parent treat on conference night, however, this could be great for those end of the year gifts too!


 I know, you're KNOT surprised about the pun... it's what I do, but you may be surprised at how easy... and cheap... these were to make! I used regular pretzel twists along with white and milk chocolate covered pretzels to fill the bags. I went to Aldi (my new obsession) for all of the tasty treats (such a bargain), printed the labels on card stock, and used regular clear gift bags that can be found at stores like Target, Walmart, or even amazon!


The bags I made were for parents, however, I have made different options for you to purchase! In addition to parents, there are also labels for students and teachers available in my TPT store! Click on the pictures below!
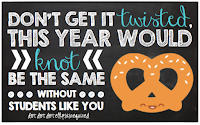
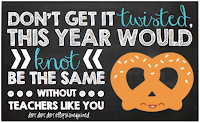
https://www.teacherspayteachers.com/Product/Printable-STUDENT-Pretzel-Gift-Bag-Tag-Label-2585421 https://www.teacherspayteachers.com/Product/Printable-TEACHER-Pretzel-Gift-Bag-Tag-Label-2585427 Parent Gift Bag Label

So, even if your end of the year is a bit hectic, you can now say you have thank you gifts covered!

Wednesday, May 11

Permanent Mark-er!

Some people just leave a permanent mark on your life. In my last post I told you about how much I loved my long term sub position because of the students I got to spend my days with, but without my amazing co-workers, I know that my experience would not have been as meaningful. We shared, laughed, vented, and... did I mention we laughed?... A LOT this year! It's a wonderful feeling knowing you have a group of people to turn to that just get it! I know I will be a better teacher because of what they taught me this year. Hopefully you are lucky enough to have a support system to lean on at work as well.

So, how did I show them that I appreciated all their help this year? 


I made something with a pun, duh! 

I gave each teacher a set of three sharpies with this little note. I was also very excited for a chance to finally use my washi tape that I've been purchasing without a purpose (see Greg, I always figure out a way to use the things I buy)!


Whether you're a first year teacher, a student teacher, or a seasoned teacher that just wants to express their appreciation for their co-workers or mentors, you should grab this gift tag in my shop! This also fits sharpie thin pens and paint markers.

If you use this gift tag, I'd love to see your variation! 

Grab it here!

Tuesday, May 10

This Year Has Blown By...

get it? because bubbles... and a blow pop... and gum... hehe
Can you even believe that this school year is almost over? The year has definitely blown by quickly... even more quickly for me because my long term substitute position just ended last Friday. I can't say that I am excited about the position ending because I really miss my little first grade friends, especially since I was with them since September, but I can say that this position has made me a better teacher and has confirmed that I am meant to be in the classroom. Luckily I am tutoring in the same school, so I still get to see them!

So, although you are excited for the school year to come to an end, appreciate those little ones that you get to have in your class with you every day for just a bit longer!

I showed my appreciation for my little guys with these:


I wanted them to know how proud they have made me this year, but I couldn't do it without a pun (which the kids totally expect from me now)!

I originally went to Target to get the $1 boxes of chalk, but the store I went to was all out. I was racking my brain while I searched the racks in the dollar spot for another idea. I turned the corner and saw the brightly colored bubbles... 3 for $1... and the rest is history!

I like this idea better than my original idea, and it ended up being cheaper! If you'd like to make these for your students as well, you can purchase the gift bag labels in my teachers pay teachers store (just click the picture below)! I chose to add in the Blow Pop and the Double Bubble, ya know... to really get my pun point across, but it works with any of those items! I also used "gussett style 4" x 2" x 9" cello bags" from Amazon, but any clear gift bag in a similar size will work!

Purchase Gift Bag Label

Don't worry, I didn't forget my wonderful co-workers that helped me make it through! Details about their punny gifts, coming soon!

Wednesday, February 10

Valentine's Day

In honor of Valentine's Day I am going to talk about a few things that I really love: decorating, crafting, and teaching!

If you follow my Instagram, you know that I decorate for every holiday! I have a buffet... a pseudo-mantle... to display my holiday decor. 


This is my Valentine's Day display... someday I will get around to posting my displays for each holiday! Most of the items I get are from places like Hobby Lobby, Homegoods, and Target.


There are also items that I make myself because I can't find what I want in the store... which leads me to second love... crafting! See those cupcakes on the fabulous cupcake tier? They are... FAKE! Seriously, they are made with foam and dry wall compound.

 If you want to make them yourself you will need:

  1. Tins and Liners: Fill cupcake tins with paper liners.
  2. Washers: Put one washer on the bottom of each cupcake liner.
  3. Expanding Foam: Fill each cupcake liner with expanding foam about half way. The expanding foam is one time use. I was able to make 3 trays of 12 "cupcakes", for a total of 36. The foam will expand, much like cupcakes do in the oven when baked!
  4. Dry: The "cupcakes" should be expanded and tack free after about 20 minutes. The instructions on the can says that the foram can be painted after 12-24 hours, I painted mine the next day.
  5. Paint: Paint each "cupcake" in a tan or brown color to mimic vanilla and chocolate cake.
  6. Frosting: Mix the dry wall compound with food coloring to make "frosting". I suggest using glass bowls because it washes off very easily. I didn't have brown food coloring, so I used paint to color the compound for chocolate, pink food coloring for the strawberry, and left the compound as is for vanilla (I made sure to purchase compound that was white, as opposed to a grey-ish color so it looked like vanilla). You want the consistency of the "frosting" to be like actual frosting, so add flour if it is too watery. 
  7. Piping bag: Fill your piping bag with the "frosting" and pipe onto the cupcakes. If you get it to the consistency of actual frosting, it should stay in the shape you pipe.
  8. Decorations: Sprinkle and add decorations onto the wet "frosting" so as it dries it will bond. Be careful with real sprinkles, the color may run if the "frosting" is too wet.
I made my cupcakes last year, and they still look great!
Speaking of making things... to let my students know how much I love teaching them, I made a special valentine for them. I found my inspiration in the Target dollar spot... well technically the $3 spot.

The valentines came like this:


I decided to make my own card to go with the donut erasers!


If you want to make the same valentines, you can find them in my Teachers Pay Teachers store here. 

So, what do you plan on doing for Valentine's Day? Have you made any crafts? Greg and I are going to go out the day after to take advantage of a 50% off bottle of wine deal, and I don't have school Monday or Tuesday! 

Thursday, July 30

Yellow & Grey to Make Your Day!

Hey teacher friends, it's been a while... sorry, I have been busy with my DIY friends (although, I know some of you fall under both categories)! You've probably been too busy enjoying summer vacation to even notice, huh?!

However, that little voice in the back of your head has you thinking about the upcoming school year... doesn't it? I have a classroom bundle just in time for your summer classroom planning!

This time my classroom bundle is for those of you that love yellow paired with grey!


Here's what's included in this 70 page bundle:

*Page 1-2: Clock Numbers (:00, :05, :10 etc.) **I use my fiskars circle punch to punch out black circles to back the numbers before laminating!**
*Page 3-10: Table numbers (small for tables, large to hang) numbers 1-6
*Page 11-21: Calendar Pieces (months, black and turquoise numbers, today/tomorrow/yesterday cards, birthday cards, blank holiday cards)
*Page 22: Homework Page (M,T,W,Th,F,Sat/sun)
*Page 23: Lesson Planning Page (math, science, social studies, reading, writing, other)
*Page 24-30: ABC Word Wall Headers
*Page 31-37: Number Cards (0-10 & three blank cards)
*Page 38-52: Animal Alphabet Cards (including 2 blank and 1 page listing what each picture is)
*Page 53: 2 Name Plates
*Page 54-55: Bulletin Board Borders (Yellow & Grey Chevron)
*Page 56- Blank Gift Bag Labels
*Page 57-61: Welcome Banner Flags
*Page 62-70: ABC Bunting

Here's a close-up preview of some of the items!
 

As always, I'd love to hear your suggestions as to what else I can create to make my classroom bundles even better! Maybe you need cursive letters for your classroom? Let me know! A behavior chart to match? Tell me what you're hoping for!

I also have a movie themed and turquoise, black, and white classroom bundle available in my TpT store!


Friday, August 9

Keep Calm and Chevron

...don't stress about your classroom decor! I have just created a turquoise, black, & white chevron classroom bundle!  I am still waiting for that public school job, and therefore, I am constantly thinking about what my classroom theme will eventually be.  I made this bundle so I have options (I am wavering between this theme and a movie theme).  This is my favorite color combo, and I LOVE chevron!!

There are a lot of classroom essentials included in these 70 pages:

*Page 1-2: Clock Numbers (:00, :05, :10 etc.) **I use my fiskars circle punch to punch out black circles to back the numbers before laminating!**
*Page 3-10: Table numbers (small for tables, large to hang) numbers 1-6
*Page 11-21: Calendar Pieces (months, black and turquoise numbers, today/tomorrow/yesterday cards, birthday cards, blank holiday cards)
*Page 22: Homework Page (M,T,W,Th,F,Sat/sun)
*Page 23: Lesson Planning Page (math, science, social studies, reading, writing, other)
*Page 24-30: ABC Word Wall Headers
*Page 31-37: Number Cards (0-10 & two blank cards)
*Page 38-52: Animal Alphabet Cards (including 2 blank and 1 page listing what each picture is)
*Page 53: 2 Name Plates
*Page 54-55: Bulletin Board Borders (Black & Turquoise Chevron)
*Page 56- Blank Gift Bag Labels
*Page 57-61: Welcome Banner Flags
*Page 62-70: ABC Bunting


As always, I'd love to hear your suggestions on what else I can make!

Friday, August 2

Lights, Camera, Action!

So, I promised I'd update you guys on my kindergarten graduation... one month later, here it is!  Graduation was great... even though the kiddies did not sing as loudly as they did during practice... there were two break downs... and one "I'm not ready, call me to get my diploma last"! 


I made popcorn cupcakes, used popcorn containers I got at the dollar store for chips and snacks, rolled out a wrapping paper 'red carpet', and put their goodies in popcorn containers from the party store! The room looked really cute... cleaning everything up a few hours later... not so cute!

Sticking with movie theme for the upcoming school year, I made a great bundle that I just posted on Teachers Pay Teachers!! I am so excited because this is my biggest packet yet, and I worked really hard on it!

Seriously, I can't stop staring at it!

I've already cut out and laminated these for myself!
I am always looking for new ideas, so if you have any suggestions for products I should make I'd love to hear them!

Now, if you can help me find my first public school job in Connecticut, I will give you a packet FOR FREE! ;)

Tuesday, May 28

Teacher Talk Tuesday: P is for Peanuts and Plants!

Have you heard of "Teacher Talk Tuesday"?... Michelle over at Apples and ABC's along with another blog have designated Tuesdays for teachers to post pictures of what they are doing in their classrooms on Instagram and hash tag it #teachertalktuesday.  Today I was excited because I finally found a use for the peanut erasers I found at the target dollar spot.  I had no idea what to do with them, but I had to have them (and a lot of them!)... I think it's funny that Greg has just stopped questioning my reason for buying things at the dollar spot, he just quietly examined the package of peanut erasers and rolled his eyes... 

Here is my #teachertalktuesday:


We're working on greater than, less than, and equal to.  I made little elephant cards with the symbols on them (and the words on the back) instead of the usual alligator that we used earlier in the year because, didn't you know, elephants love peanuts! The kids rolled dice, chose the two different amounts of peanuts, and had to figure out which sign completed the equation correctly. 

We're also working on plants, and if you are too, check out my life cycle of a plant packet on Teachers Pay Teachers.  I have all of the activities from this packet set up in my classroom and...


...last week we observed different types of plants outside... we were able to sneak out in between rain showers.  I used the awesome clipboards I got in the... everyone together now... TARGET DOLLAR SPOT (duh!).  I plan on Modge Podging something to go along with my classroom movie theme on them eventually.


So there you have it, P is for plants and peanuts!

What are you working on?
Enhanced by Zemanta

Saturday, May 4

Oh, HOPPY Day!

I am SUPER EXCITED! I just made my first packet for Teachers Pay Teachers!  We are learning about animals and life cycles in my kindergarten class, but I hated the pictures that were provided in the curriculum binder!  I decided to make something that better fit my own style and VOILA...


... my "Life Cycle of a Frog" packet was born (no pun intended)!

Here's what's included:
  • Page 1: Life cycle poster
  • Page 2-5: Life cycle stages writing pages
  • Page 6: Life cycle stages cards
  • Page 7-8: Word wall cards with pictures
  • Page 9-12: Memory matching game
  • Page 13-18: Large bulletin board pictures (eggs, tadpole, froglet, frog, arrow) & word cards.
  • Page 19: Life cycle fill-in worksheet
  • Page 20-25: Pattern strips and cards (pre-made and blank)
If you're interested you can buy the packet at my store... then check out Scrappin Doodles, where I get some of my awesome clip art (until I finally figure out how to make my own)! I will be making this packet for the life cycle of a chicken, ladybug, butterfly, plant... and possibly a fish. 

If there is something you want included in the packet, but don't see, let me know! I would love to create something to meet your personal classroom needs... suggestions are definitely welcome!!

HOPPY Saturday... sorry, not sorry!

Tuesday, April 2

Teacher Tuesday: Playing Card Addition & Subtraction Worksheets

Here's an easy worksheet I used with my class today.  Students chose playing cards to make addition or subtraction sentences.  The kids are doing well with both... I think they are starting to understand the difference between plus and minus without being reminded!

You can grab the addition and subtraction worksheets in my TpT store!